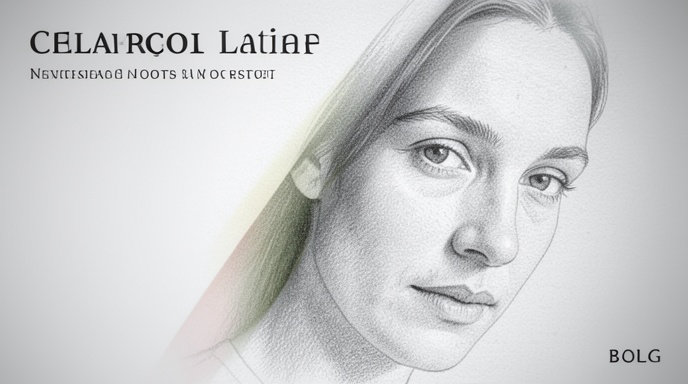
Introduction
Photo to pencil sketch conversion is now fast, accessible, and highly customizable thanks to AI converters, browser-based editors, and classic layer-based workflows in tools like Photoshop and Affinity Photo. The best results come from choosing a source image with strong edges and clear subject separation, then fine-tuning contrast, blur, and shading so the final sketch looks intentional rather than filter-like.
What makes a good photo-to-pencil-sketch result
A convincing pencil sketch depends on the structure already present in the photo. Images with visible edge detail, strong subject focus, and clean lighting tend to convert more naturally because the sketch effect can preserve contours and tonal transitions instead of inventing them.
In practice, the most useful source images usually have:
- Clear facial features for portraits
- Distinct outlines and texture for objects
- Strong depth and visible foreground/background separation
- Even lighting with not too much noise
- Moderate sharpness without motion blur
Portraits often work especially well because sketch effects can emphasize eyes, hair, cheek contours, and clothing folds. Landscapes can also look striking when the image contains trees, buildings, mountains, clouds, or paths that create readable line structure. Still-life and object photos are another good match because their shapes and shadows translate cleanly into graphite-like shading.
Why AI tools are popular for photo to pencil sketch
Modern AI photo-to-sketch tools simplify the process to just uploading an image, choosing a sketch style, and downloading the result. Many of these tools are designed for quick conversion without manual editing, and some advertise no sign-up, instant processing, or no-watermark output.
These tools are useful when you want:
- Fast results with minimal editing
- Multiple styles such as pencil sketch, line art, or artistic drawing
- Easy creation for portraits, landscapes, and social media graphics
- A simple workflow on desktop or mobile
Canva, Fotor, Monica AI, and similar services position sketch conversion as a one-step or few-step process, typically involving upload, style selection, generation, and download. That makes them especially practical for casual users, marketers, and creators who need polished visuals quickly.
Traditional editing workflows still matter
Even with AI tools, classic editing workflows remain valuable because they offer more control over line strength, contrast, and realism. A common manual method in Photoshop is to convert the photo to grayscale, duplicate the layer, invert it, change the blending mode to Color Dodge or Linear Dodge, and then apply Gaussian Blur until the sketch effect appears.
A similar Affinity Photo workflow uses duplication, inversion, Color Dodge blending, Gaussian Blur, and then tonal adjustments such as HSL or Levels to refine the final appearance. Photoshop tutorials also show that using Color Dodge often produces sharper edges, while Linear Dodge can create a softer result.
This matters because not every image needs the same treatment. A portrait may benefit from stronger eye and hair lines, while a landscape may look better with softer tonal transitions and less aggressive edge enhancement.
A simple photo to pencil sketch workflow
A practical workflow can be divided into four stages: prepare the image, generate the sketch, refine the tones, and finish with texture or styling.
1. Prepare the source image
Start by choosing a photo with usable detail and clear contrast. Crop out distractions, straighten the composition if needed, and remove unnecessary background clutter before conversion.
Helpful preparation steps include:
- Crop tightly around the main subject
- Brighten a dark image if needed
- Reduce heavy color distractions
- Sharpen slightly if the photo is soft
- Avoid overcompressed or noisy files when possible
If you are using a phone app, several sketch tools also support quick cropping before applying the effect.
2. Convert the photo into a sketch
If you want a fast result, use an AI sketch converter or a free online sketch tool. These tools typically let you upload the image, pick a style, and generate a sketch in one pass.
If you want more control, use a layered editing workflow. A common method is:
- Convert the image to grayscale
- Duplicate the layer
- Invert the duplicate
- Set the blend mode to Color Dodge or Linear Dodge
- Apply Gaussian Blur
- Adjust blur strength until the lines and shading look balanced
The blur amount is one of the most important variables. Less blur can preserve more detail and produce stronger lines, while more blur can create a softer, more blended pencil look.
3. Refine contrast and shading
Once the sketch effect appears, tonal refinement makes the image feel more like real graphite. Tutorials commonly recommend Levels, Black and White, HSL saturation reduction, or similar tonal adjustments to deepen outlines and remove any remaining color.
Useful refinements include:
- Increase contrast to darken major pencil lines
- Lower saturation to eliminate leftover color tint
- Use Levels to push shadows and brighten highlights
- Fine-tune blur to avoid muddy midtones
- Paint out unwanted artifacts or stray lines with a mask or brush
In Photoshop-based workflows, lowering saturation after the sketch conversion helps make the image look more like traditional graphite rather than a stylized digital effect.
4. Add finishing touches
The final touch is often what makes the image feel authentic. Adding a paper texture, subtle grain, or a slightly warm tone can make the sketch look more like it was drawn by hand. Some Photoshop workflows also experiment with color overlays in Color blend mode to tint the sketch while keeping the drawn look intact.
Finishing options include:
- Paper texture overlay
- Slight sepia or warm gray tint
- Controlled vignette for focus
- Selective cleanup of facial features or backgrounds
- Duplicate layers for stronger line presence
Best practices for realistic pencil sketches
Realistic sketches usually depend on restraint. Over-processing can make the image look harsh, while too little processing can make it look like a faded photo rather than a drawing.
To keep the result convincing:
- Use images with natural light and readable shadows
- Preserve important facial details such as eyes, lips, and hair
- Keep backgrounds simple when the subject is a portrait
- Avoid excessive blur that destroys edge definition
- Use contrast strategically rather than uniformly across the frame
If the goal is a hand-drawn look, slight imperfections can help. Real pencil art is rarely perfectly even, so some variation in line weight and tonal density often improves authenticity.
Choosing the right sketch style for different subjects
Different subjects benefit from different sketch treatments, and many AI tools now offer multiple styles such as pencil sketch, line art, and artistic drawing.
Portraits
Portraits usually benefit from a style that preserves facial structure while emphasizing eyes, hair, and expression. A softer graphite effect can be flattering for selfies, profile pictures, and family portraits, while a stronger outline style works well for editorial graphics or social profile avatars.
Good portrait settings often include:
- Medium contrast
- Careful edge preservation
- Controlled background cleanup
- Slightly darker eyes and hair detail
- Minimal noise in skin tones
Landscapes
Landscapes can look dramatic as sketches because trees, buildings, roads, and horizon lines create natural structure. For these images, a lighter pencil style can preserve depth and atmospheric perspective, while too much contrast may flatten the scene.
Good landscape settings often include:
- Softer blur for atmospheric detail
- More visible horizon and architectural lines
- Moderate tonal separation in sky and ground
- Reduced clutter in busy foliage areas
Objects and still life
Objects and still-life images work well when shape and shadow matter more than facial detail. Product photos, flowers, books, cups, and instruments can become elegant sketch illustrations with clean contours and restrained shading.
Good object settings often include:
- Sharper outlines
- Controlled highlights
- Background simplification
- Balanced shadow density
Social media content
For social media, sketch effects are often used to create eye-catching profile photos, story posts, thumbnails, and announcement graphics. A sketch look can stand out because it feels more artistic than a standard photo, especially when paired with bold typography or a clean layout.
For social content, aim for:
- High subject readability at small sizes
- Clean background separation
- Strong contrast for feed visibility
- Consistent styling across a series of posts
- Slightly stylized treatment that still preserves identity
AI sketch tools vs manual editing: when to use each
AI tools are best when speed and convenience matter most. Manual editing is best when you want control over line quality, tonal balance, and the exact level of realism.
| Approach | Best for | Strengths | Limitations |
|---|---|---|---|
| AI sketch tools | Quick conversions, social media, casual use | Fast, simple, often beginner-friendly | Less precise control over tone and edge detail |
| Manual editor workflows | Custom results, higher realism, print-ready work | Fine control over blur, contrast, and texture | Takes more time and editing skill |
In many cases, the strongest workflow is hybrid: use an AI tool for the first conversion, then refine the image in an editor to improve contrast, remove artifacts, and add texture.
Common mistakes to avoid
Several issues can make a sketch conversion look weak or artificial:
- Starting with a blurry or low-quality photo
- Using too much blur and losing the subject’s identity
- Keeping background clutter that competes with the main subject
- Leaving color artifacts in a sketch that should look monochrome
- Over-darkening every area so the image loses depth
- Using a style that does not match the subject
If a result looks too digital, reduce the intensity and reintroduce subtle tonal variation. If it looks too faint, increase contrast and strengthen the key outlines.
Creative ways to use photo-to-pencil-sketch images
Sketch conversions are useful beyond simple art edits. They can support branding, content design, gifts, and digital storytelling.
Popular uses include:
- Profile pictures with a hand-drawn identity
- Social media announcement graphics
- Event posters and invitation art
- Personalized gifts and prints
- Portfolio pieces and visual experiments
- Before-and-after content for creative accounts
A pencil sketch can also work as a design asset inside larger compositions, especially when combined with text overlays, soft backgrounds, or collage elements.
Practical editing tips for stronger results
If you want your sketch to look more polished, these edits tend to help:
- Increase edge clarity around the eyes, mouth, and hair in portraits
- Reduce background strength so the subject remains dominant
- Use selective sharpening only where detail matters
- Apply a slight paper texture rather than a heavy grain
- Keep enough white space so the sketch breathes visually
- Test multiple blur levels before settling on the final look
For manual workflows, duplication and inversion create the basic sketch mechanism, while the blur radius controls how much of the underlying image is revealed. For AI workflows, style choice is the main creative control, so testing a few presets is often the fastest way to find the right balance.
Suggested structure for a blog draft on this topic
A strong blog article on photo-to-pencil-sketch conversion should move from easy concepts to more advanced refinement, such as:
- What photo-to-pencil-sketch means
- Why sketch effects are popular
- How AI tools simplify the process
- How manual editing produces more control
- How to choose the right source image
- How to adjust contrast, shading, and blur
- Which sketch styles work best for portraits, landscapes, and social media
- How to avoid common mistakes
- How to make the result look more realistic and artistic
That structure keeps the article logical and practical while serving both beginners and readers who want more advanced creative control.
If you want, I can also turn this into a fully polished SEO blog post with an introduction, H2/H3 formatting, keyword-rich subheadings, and a more natural editorial voice.
Create Beautiful Pencil Sketches Faster with AI4Chat
If your article is about turning a photo into a pencil sketch, AI4Chat gives readers the exact tools they need to transform and refine images without complicated software. It’s a simple way to create artistic, hand-drawn-style results from any photo while staying in one easy platform.
Image to Image for Instant Sketch-Style Transformations
AI4Chat’s AI Text to Image & Image to Image tools make it easy to convert a regular picture into a pencil sketch-inspired version. Users can take a portrait, landscape, or product photo and generate artistic variations that look drawn by hand.
- Turn photos into sketch-like artwork in seconds
- Create multiple artistic versions from the same image
- Use advanced models for more detailed, stylized results
AI Image Editor to Polish the Final Sketch
Once the sketch is generated, the AI Image Editor helps users clean up and prepare the final image. They can resize, compress, or upscale the sketch so it looks crisp for social media, printing, portfolios, or online use.
- Upscale sketch images for better detail
- Resize for posts, thumbnails, or print formats
- Compress files for faster sharing and uploading
AI Chat with Files and Images for Better Creative Control
With AI Chat with Files and Images, users can upload a source photo and ask for guidance on the best sketch style, composition, or editing approach. It’s a helpful way to get creative suggestions before generating the final artwork.
- Upload a photo and ask what sketch style fits best
- Get feedback on lighting, contrast, and composition
- Make smarter creative decisions before editing
Conclusion
Turning a photo into a pencil sketch is easiest when the source image has strong edges, clear subject separation, and balanced lighting. AI tools make the process fast and accessible, while manual workflows in Photoshop or Affinity Photo offer deeper control over blur, contrast, shading, and texture.
Whether you are creating portraits, landscapes, product art, or social media visuals, the best results come from matching the sketch style to the subject and finishing the image with subtle refinement. With the right combination of preparation, conversion, and polishing, almost any photo can be transformed into a clean, realistic, hand-drawn-looking sketch.